Create Airport and PlaneType CRUD
Create the Entity 'Airport'
- Open with Visual Studio 2026 or VS Code the solution '...\MyFirstProject\DotNet\MyFirstProject.sln'.
- In '...\MyFirstProject\DotNet\MyCompany.MyFirstProject.Domain' create
Fleetfolder. - Create
Entitiessubfolder. - Create empty class
Airport.csand add:
// <copyright file="Airport.cs" company="TheBIADevCompany">
// Copyright (c) TheBIADevCompany. All rights reserved.
// </copyright>

namespace MyCompany.MyFirstProject.Domain.Fleet.Entities
{
    using Audit.EntityFramework;
    using BIA.Net.Core.Domain.Entity;

    /// <summary>
    /// The airport entity.
    /// </summary>
    [AuditInclude]
    public class Airport : BaseEntity<int>
    {
        /// <summary>
        /// Gets or sets the name of the airport.
        /// </summary>
        public string Name { get; set; }

        /// <summary>
        /// Gets or sets the City where is the airport.
        /// </summary>
        public string City { get; set; }
    }
}
Update Data
Create the Modelbuilder
- In '...\MyFirstProject\DotNet\MyCompany.MyFirstProject.Infrastructure.Data\ModelBuilders', create empty class
PlaneModelBuilder.csand add:
// <copyright file="PlaneModelBuilder.cs" company="TheBIADevCompany">
// Copyright (c) TheBIADevCompany. All rights reserved.
// </copyright>

namespace MyCompany.MyFirstProject.Infrastructure.Data.ModelBuilders
{
    using Microsoft.EntityFrameworkCore;
    using MyCompany.MyFirstProject.Domain.Fleet.Entities;

    /// <summary>
    /// Class used to update the model builder for plane domain.
    /// </summary>
    public static class PlaneModelBuilder
    {
        /// <summary>
        /// Create the model for projects.
        /// </summary>
        /// <param name="modelBuilder">The model builder.</param>
        public static void CreateModel(ModelBuilder modelBuilder)
        {
            CreateAirportModel(modelBuilder);
        }

        /// <summary>
        /// Create the model for aiports.
        /// </summary>
        /// <param name="modelBuilder">The model builder.</param>
        private static void CreateAirportModel(ModelBuilder modelBuilder)
        {
            modelBuilder.Entity<Airport>().Property(p => p.Name).IsRequired().HasMaxLength(64);
            modelBuilder.Entity<Airport>().Property(p => p.City).IsRequired().HasMaxLength(64);
        }
    }
}
Update DataContext file
- Open '...\MyFirstProject\DotNet\MyCompany.MyFirstProject.Infrastructure.Data\DataContext.cs' and add :
/// <summary>
/// Gets or sets the Airport DBSet.
/// </summary>
public DbSet<Airport> Airports { get; set; }
- On
OnModelCreatingmethod add thePlaneModelBuilder.CreateModel:
PlaneModelBuilder.CreateModel(modelBuilder);
Update the DataBase
- In VSCode (folder MyFirstProject) press F1
- Click "Tasks: Run Tasks".
- Click "Database Add migration SqlServer" if you use SqlServer or "Database Add migration PostGreSql" if you use PostGerSql.
- Set the name "NewFeatureAirport" and press enter.
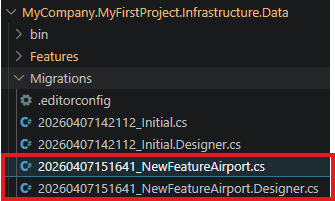
- Verify new file
xxx_NewFeatureAirport.csis created on '...\MyFirstProject\DotNet\MyCompany.MyFirstProject.Infrastructure.Data\Migrations' folder, and file is not empty.
- In VSCode Run and Debug "DotNet DeployDB"
- Verify
Airportstable is created in the database.

Create the DTO
Using BIAToolKit
For more informations about creating a DTO, see Create a DTO with BIAToolkit documentation
- Open the BIAToolkit
- Go to "Modify existing project" tab
- Set the projects parent path and choose your project
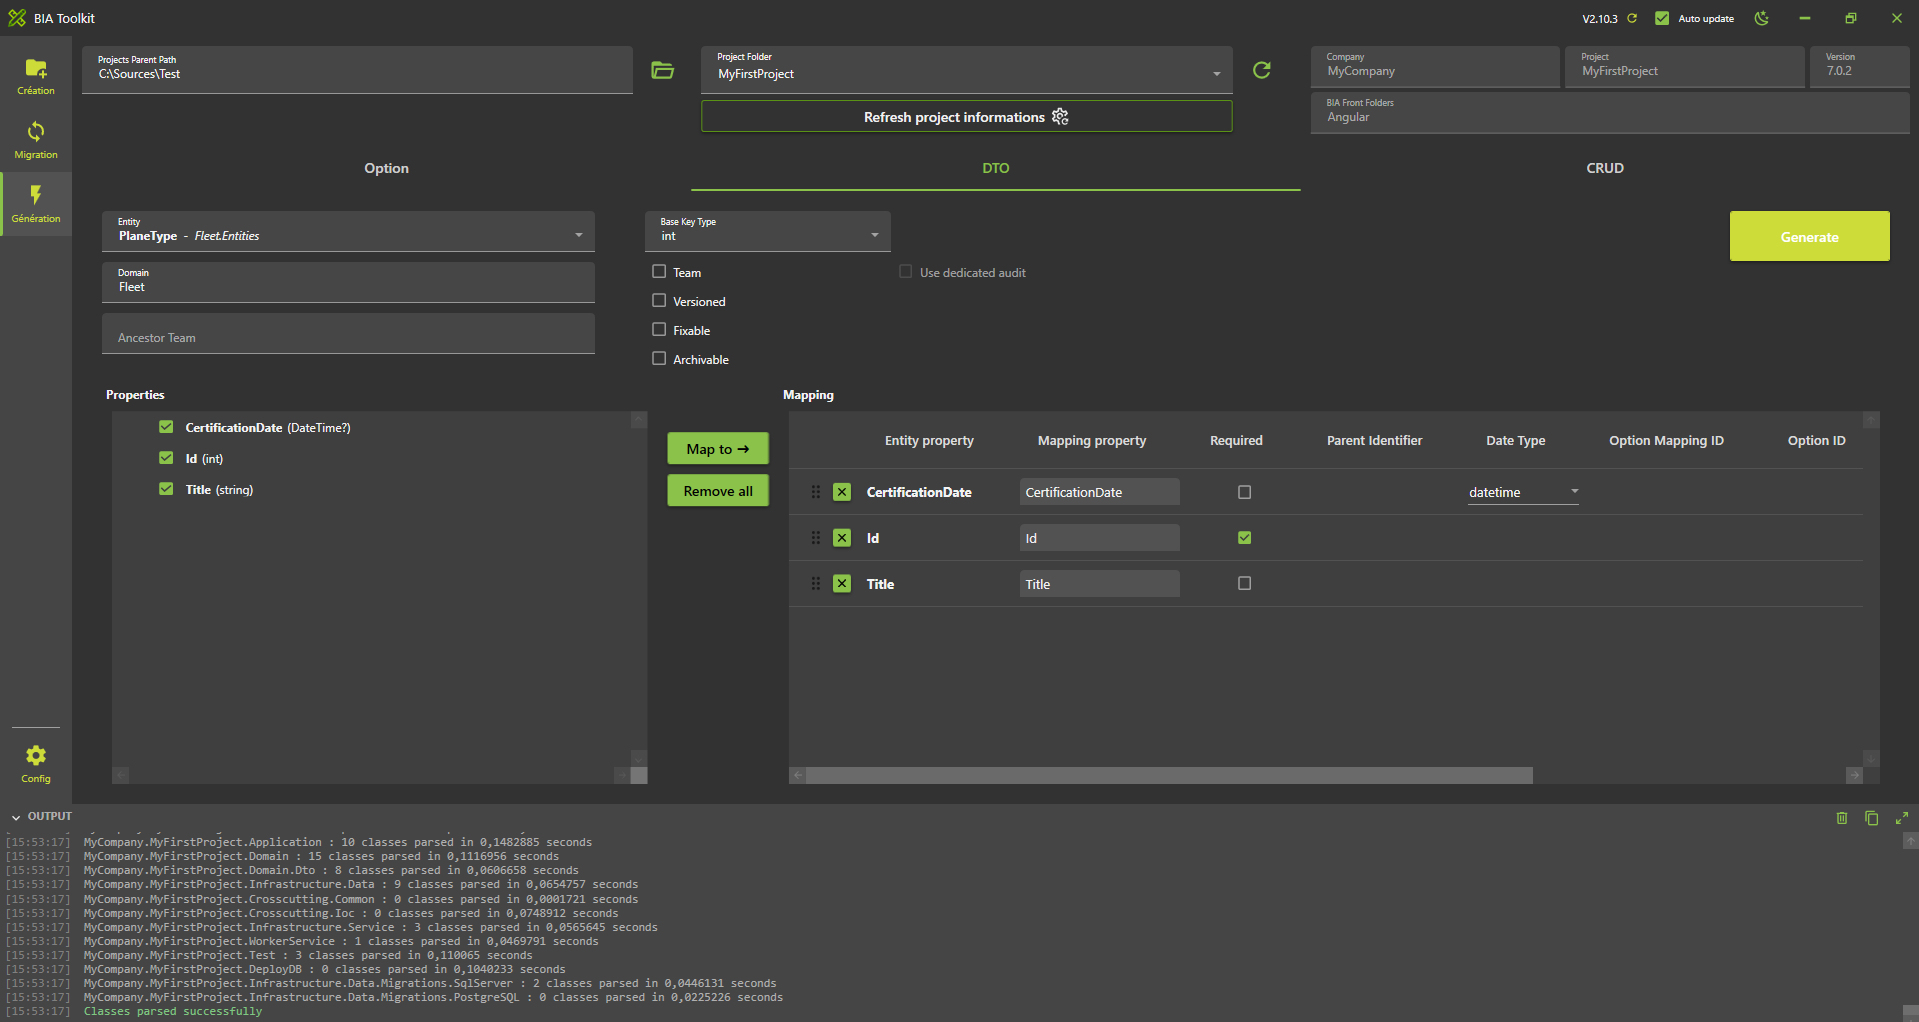
- Go to tab 3 "DTO Generator"
- Select your entity
Airporton the list
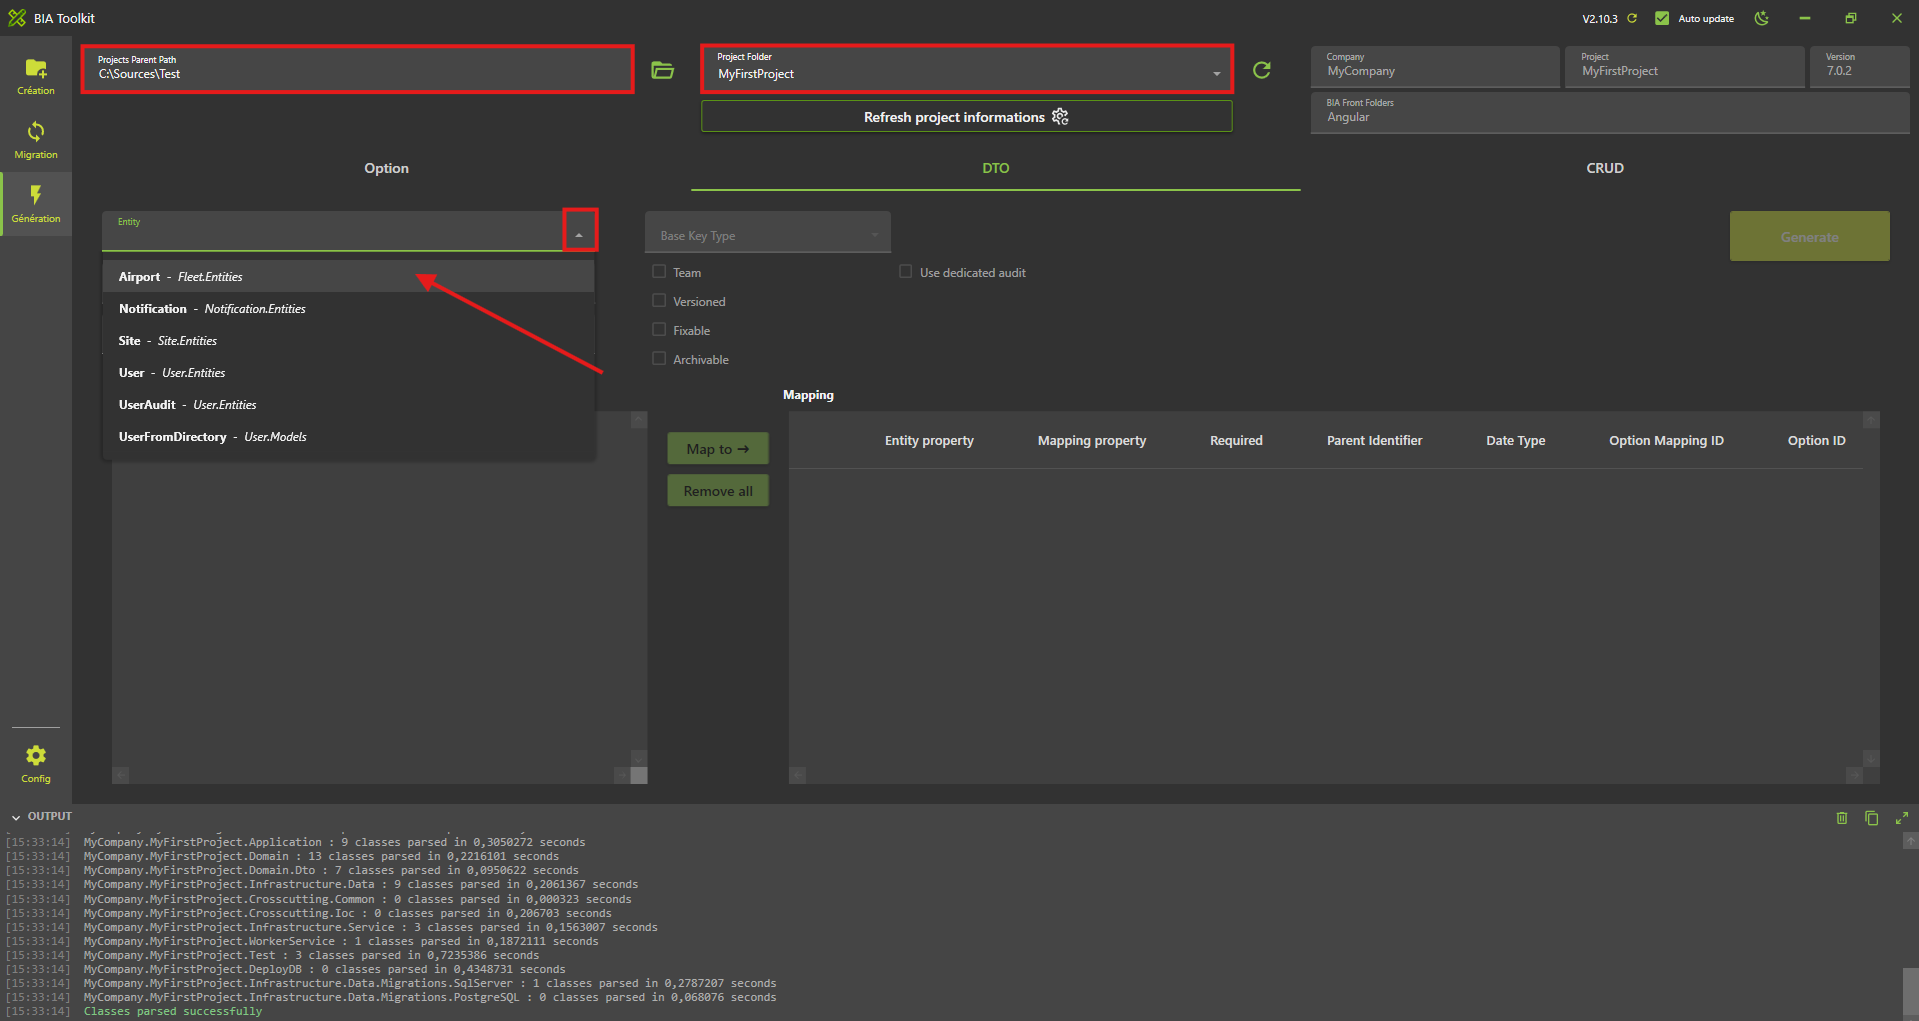
- Click on "Map to" button
- All the selected properties will be added to the mapping table that represents that properties that will be generated in your corresponding DTO
- Check the required checkbox for the Id mapping property
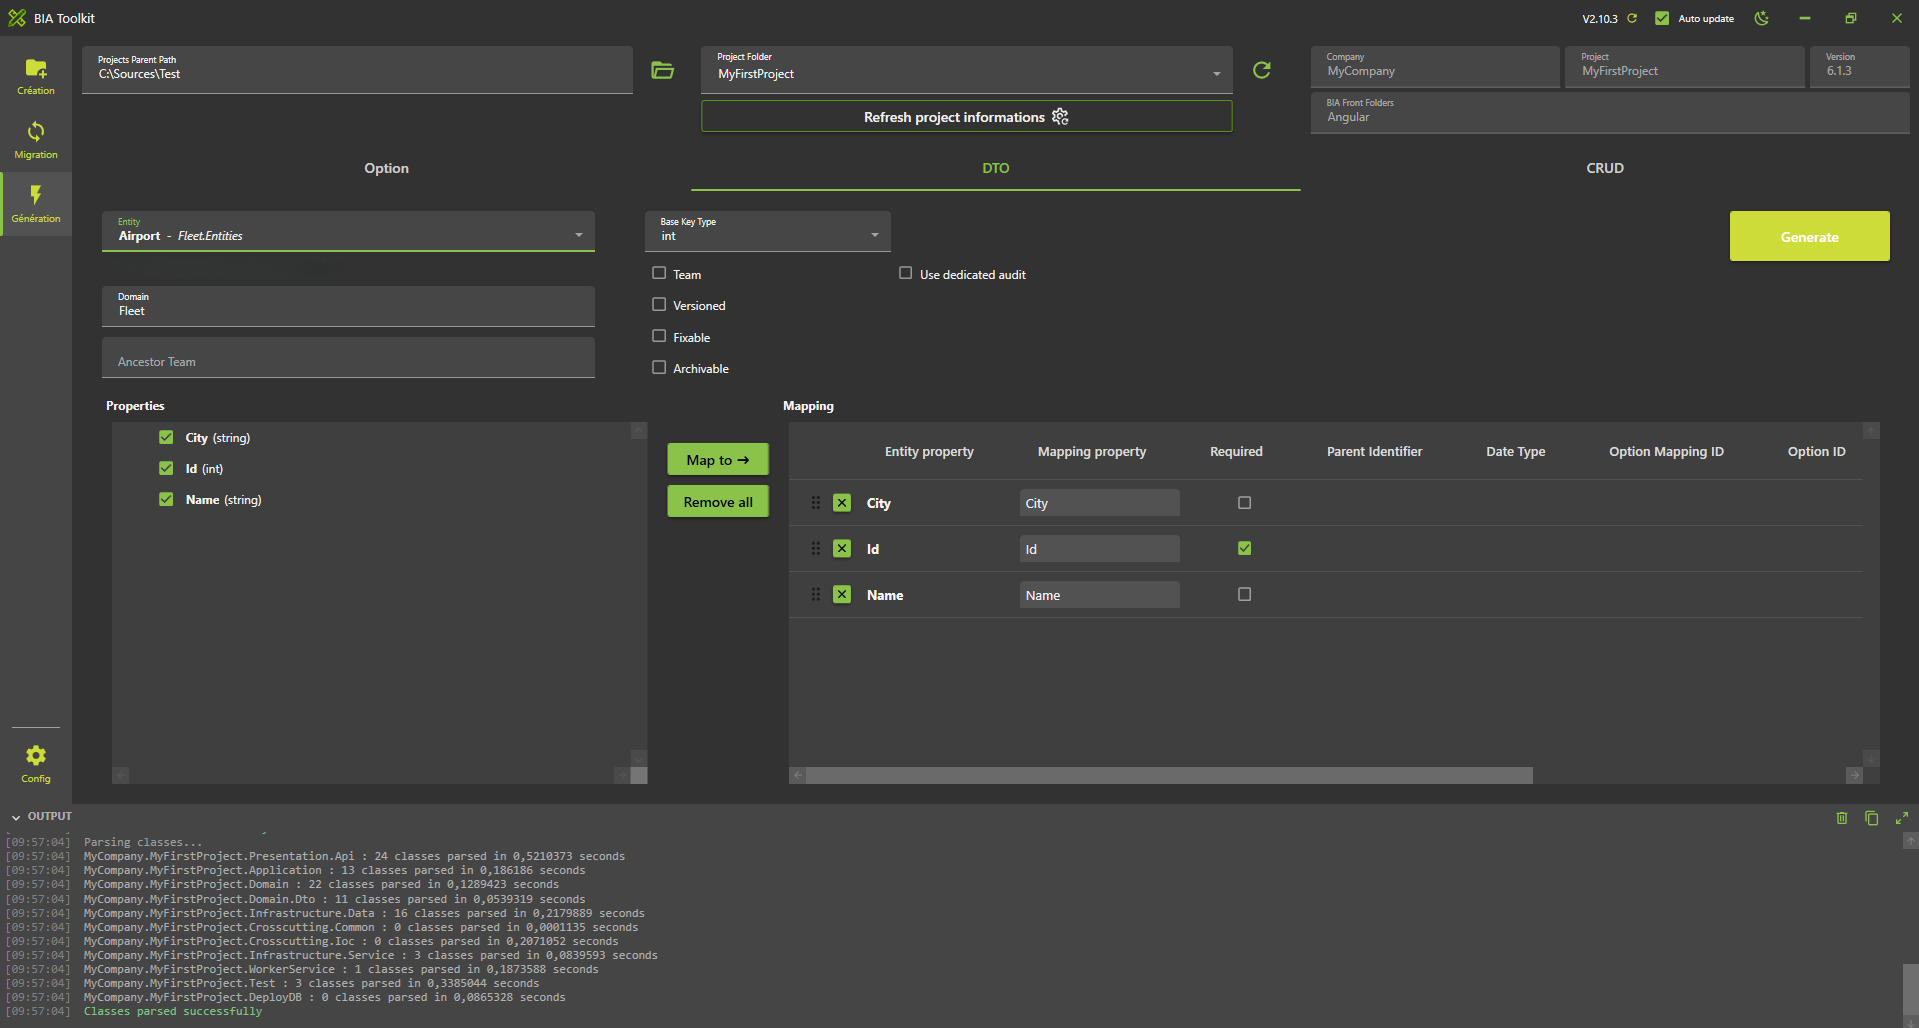
- Then click the "Generate" button
- The DTO and the mapper will be generated
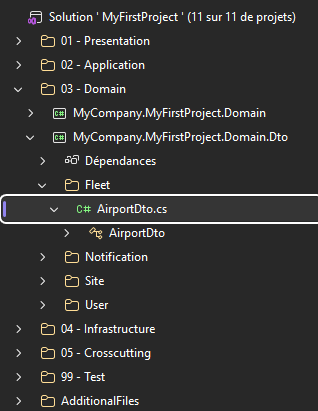
- Check in the project solution if the DTO and mapper are present
Create the CRUD
Using BIAToolKit
For more informations about creating a CRUD, see Create a CRUD with BIAToolkit documentation
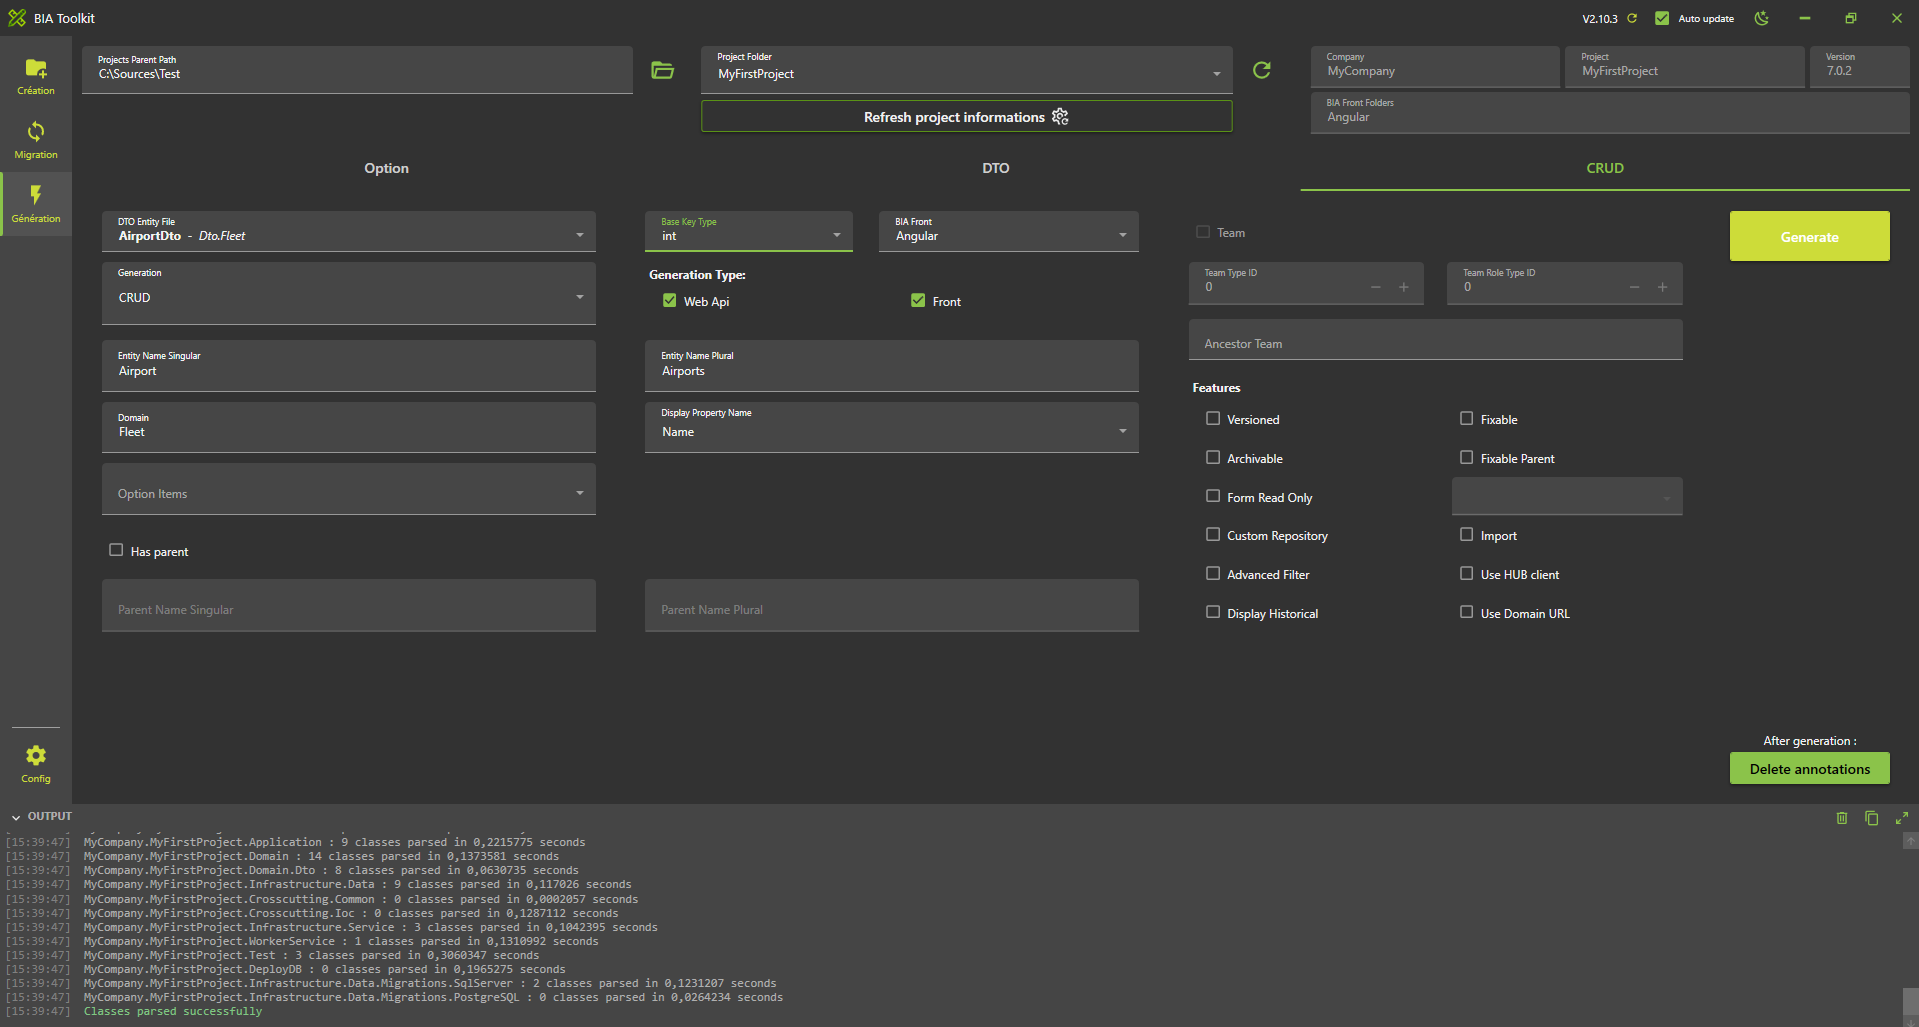
- Start the BIAToolKit and go on "Modify existing project" tab*
- Set the projects parent path and choose your project
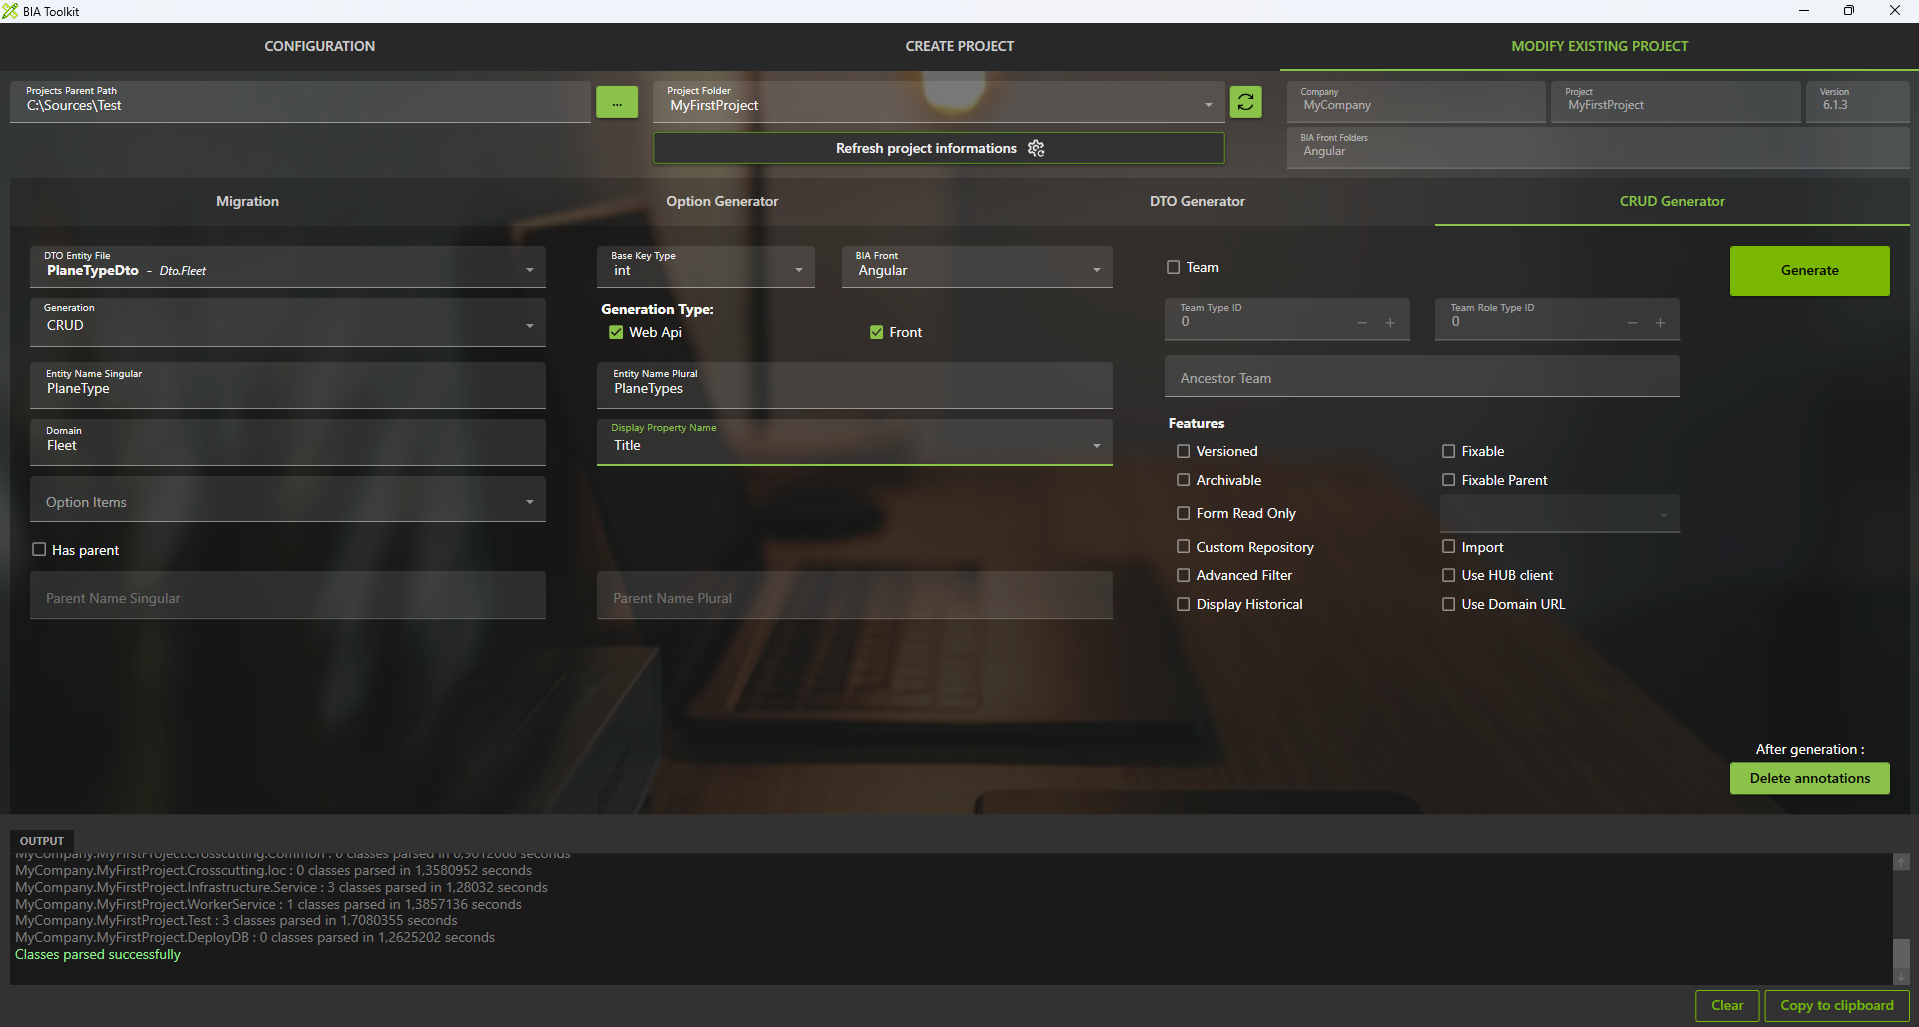
- Go to tab 4 "CRUD Generator"
- Choose Dto file: AirportDto.cs
- Check "WebApi" and "Front" for Generation
- Check "CRUD" for Generation Type
- Domain name should be "Fleet"
- Set Base key type as int
- Verify "Entity name (singular)" value: Airport
- Verify "Entity name (plural)" value: Airports
- Choose "Display item": Name
- Click on generate button
Launch application generation
- In VSCode Stop all debug launched.
- Run and debug "Debug Full Stack"
- The swagger page will be open.
- Open a browser at address http://localhost:4200/
- Click on "APP.AIRPORTS" in menu to display
Airportspage.
Add traduction
- Open 'src/assets/i18n/app/en.json' and add:
  "app": {
    ...,
    "airports": "Airports"
  },
    ...,
  "airport": {
    "add": "Add airport",
    "city": "City",
    "edit": "Edit airport",
    "listOf": "List of airports",
    "name": "Name"
  }
- Open 'src/assets/i18n/app/es.json' and add:
  "app": {
    ...,
    "airports": "Aeropuertos"
  },
    ...,
  "airports": {
    "add": "Añadir aeropuerto",
    "city": "Ciudad",
    "edit": "Editar aeropuerto",
    "listOf": "Lista de aeropuertos",
    "name": "Nombre"
  }
- Open 'src/assets/i18n/app/fr.json' and add:
  "app": {
    ...,
    "airports": "Aéroports"
  },
    ...,
  "airports": {
    "add": "Ajouter aéroport",
    "city": "Ville",
    "edit": "Modifier aéroport",
    "listOf": "Liste des aéroports",
    "name": "Nom"
  }
Test
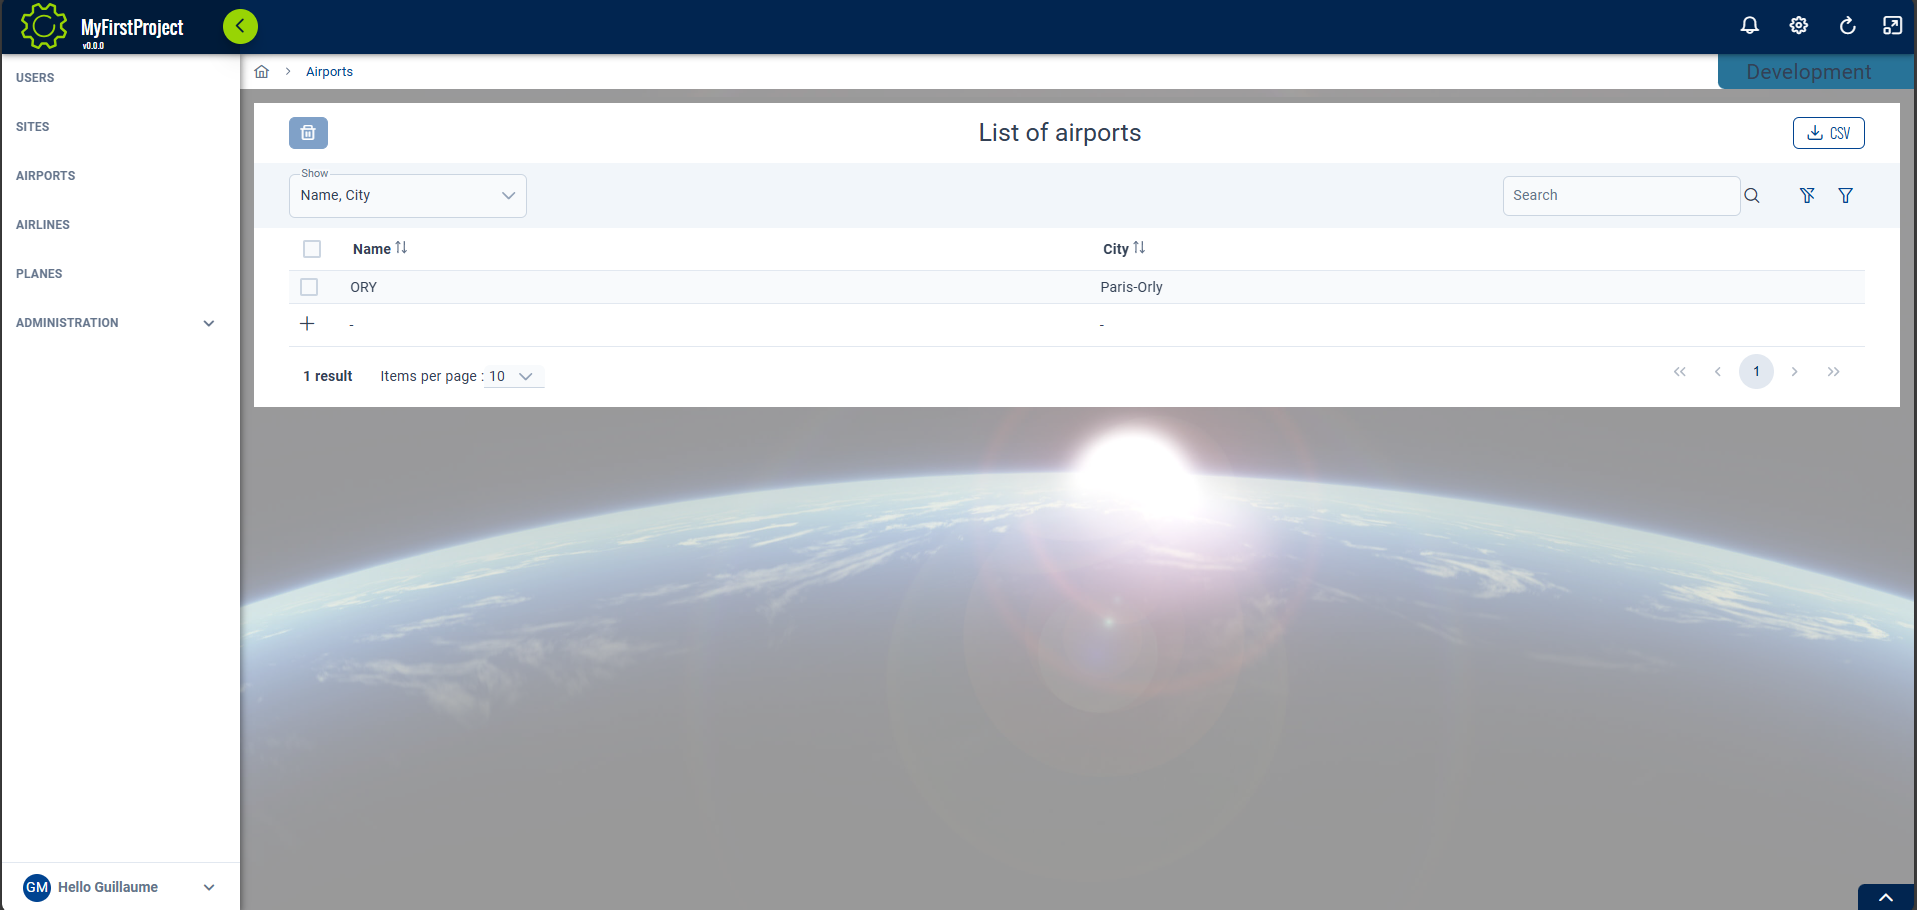
- Open web navigator on address: http://localhost:4200/ to display front page.
- Verify 'Airports' page have the good name (name put on previous file).
- Open 'Airports' page and verify labels have been replaced too.
- To be able to add element in this table you need to be "administrator" of the current site:
- Click on "site" menu and click on "+" button.
- Enter a title like "Site 1" and click the button "+ Add"
- Now click on the row "Site 1" to enter in the List of members of the "Site 1"
- Click on "+"" button to open add member screen
- Select you name in user combo and check the role "Site administrator"
- Click on "+" button. => You are now "Site administrator" of the "Site 1"
- Refresh the token with the round arrow in the upper right corner.
- Navigate to the Airports menu. => you should be able to enter new value in the row beginning with "+" => when you leave the row the data will be record in the database.
Create the entity 'PlaneType'
Now let's do the same steps but with 'PlaneType'
- In '...\MyFirstProject\DotNet\MyCompany.MyFirstProject.Domain\Fleet\Entities'
- Create empty class
PlaneTypeand add :
// <copyright file="PlaneType.cs" company="MyCompany">
//     Copyright (c) MyCompany. All rights reserved.
// </copyright>

namespace MyCompany.MyFirstProject.Domain.Fleet.Entities
{
    using System;
    using BIA.Net.Core.Domain.Entity;

    /// <summary>
    /// The plane entity.
    /// </summary>
    public class PlaneType : BaseEntity<int>
    {
        /// <summary>
        /// Gets or sets the id.
        /// </summary>
        public int Id { get; set; }

        /// <summary>
        /// Gets or sets the Manufacturer's Serial Number.
        /// </summary>
        public string Title { get; set; }

        /// <summary>
        /// Gets or sets the first flight date.
        /// </summary>
        public DateTime? CertificationDate { get; set; }
    }
}
Update Data
Update the ModelBuilder
- In '...\MyFirstProject\DotNet\MyCompany.MyFirstProject.Infrastructure.Data\ModelBuilders', open class
PlaneModelBuilder.csand add:
        public static void CreateModel(ModelBuilder modelBuilder)
        {
        ...
            CreatePlaneTypeModel(modelBuilder);
        }

        /// <summary>
        /// Create the model for planes.
        /// </summary>
        /// <param name="modelBuilder">The model builder.</param>
        private static void CreatePlaneTypeModel(ModelBuilder modelBuilder)
        {
            modelBuilder.Entity<PlaneType>().HasKey(p => p.Id);
            modelBuilder.Entity<PlaneType>().Property(p => p.Title).IsRequired().HasMaxLength(64);
            modelBuilder.Entity<PlaneType>().Property(p => p.CertificationDate).IsRequired(false);
        }
Update DataContext file
- Open '...\MyFirstProject\DotNet\MyCompany.MyFirstProject.Infrastructure.Data\DataContext.cs' file and declare the DbSet associated to
PlaneType:
        /// <summary>
        /// Gets or sets the Plane DBSet.
        /// </summary>
        public DbSet<PlaneType> PlanesTypes { get; set; }
Update the DataBase
- In VSCode (folder MyFirstProject) press F1
- Click "Tasks: Run Tasks".
- Click "Database Add migration SqlServer" if you use SqlServer or "Database Add migration PostGreSql" if you use PostGerSql.
- Set the name "NewFeaturePlaneType" and press enter.
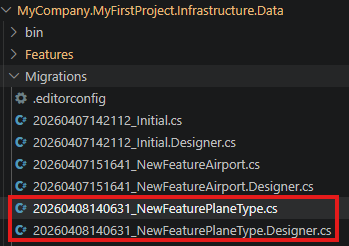
- Verify new file
xxx_NewFeaturePlaneType.csis created on '...\MyFirstProject\DotNet\MyCompany.MyFirstProject.Infrastructure.Data\Migrations' folder, and file is not empty.
- In VSCode Run and Debug "DotNet DeployDB"
- Verify
PlanesTypestable is created in the database.

Create the DTO
Using BIAToolKit
- Follow the same steps as for the Airports's DTO but replace the entity selected by
PlaneType - Fleet.Entities
Create the CRUD
Using BIAToolKit
- Follow the same steps as for the Airports's CRUD but adapt the fields with PlaneType's specifications
- Click on generate button
Launch application generation
- In VSCode Stop all debug launched.
- Run and debug "Debug Full Stack"
- The swagger page will be open.
- Open a browser at address http://localhost:4200/
- Click on "APP.PLANESTYPES" in menu to display
PlaneTypepage.
Complete traduction
- Open 'src/assets/i18n/app/en.json' and add:
  "app": {
    ...,
    "planeTypes": "Planes types"
  },
    ...,
  "planeType": {
    "add": "Add type of planes",
    "certificationDate": "Certification date",
    "edit": "Edit type of planes",
    "listOf": "List of types of planes",
    "title": "Title"
  }
- Open 'src/assets/i18n/app/es.json' and add:
  "app": {
    ...,
    "planeTypes": "Tipos de aviones"
  },
    ...,
  "planeType": {
    "add": "Añadir tipos de aviones",
    "certificationDate": "Fecha de certificación",
    "edit": "Editar tipos de aviones",
    "listOf": "Lista de tipos de aviones",
    "title": "Título"
  }
- Open 'src/assets/i18n/app/fr.json' and add:
  "app": {
    ...,
    "planeTypes": "Types d'avions"
  },
    ...,
  "planeType": {
    "add": "Ajouter type d'avions",
    "certificationDate": "Date de certification",
    "edit": "Modifier type d'avions",
    "listOf": "Liste des types d'avions",
    "title": "Titre"
  }
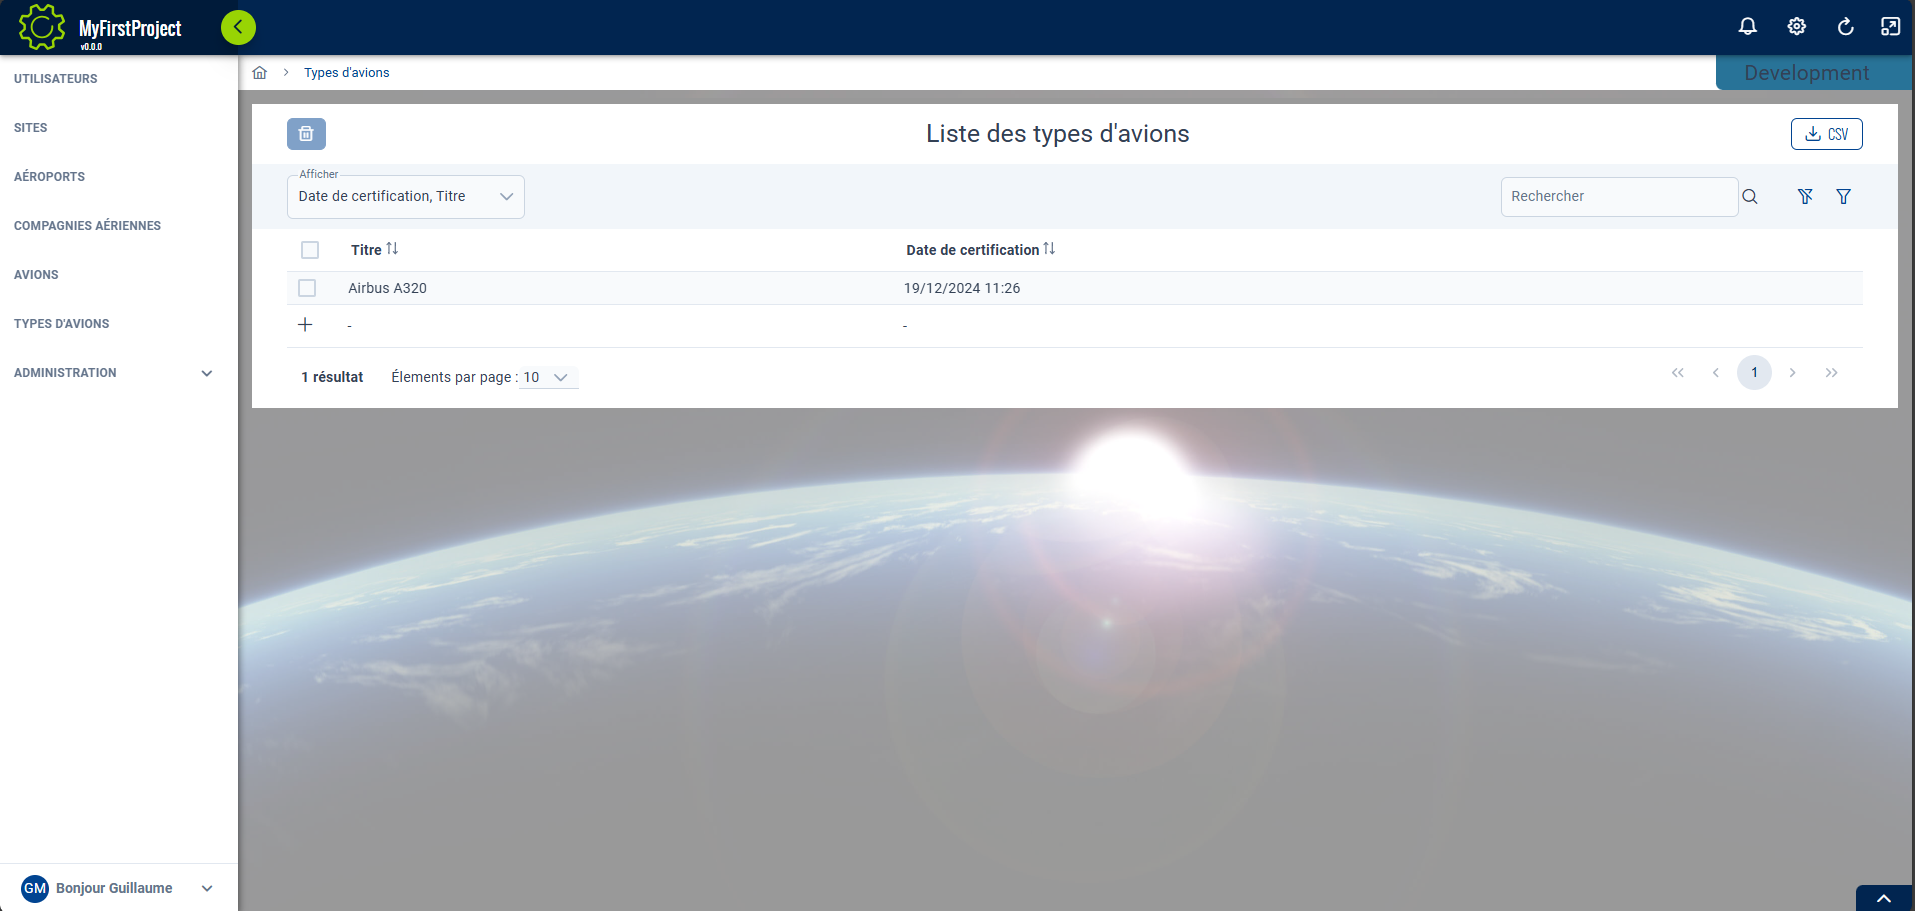
Test
- Open web navigator on address: http://localhost:4200/ to display front page
- Verify 'Plane Types' page have the good name
- Open 'Plane Types' page and verify labels have been replaced too.
- Since you already created an administrator account in the Airport part you should be able to create a new Plane Type by clicking on the "+" and filling the row.